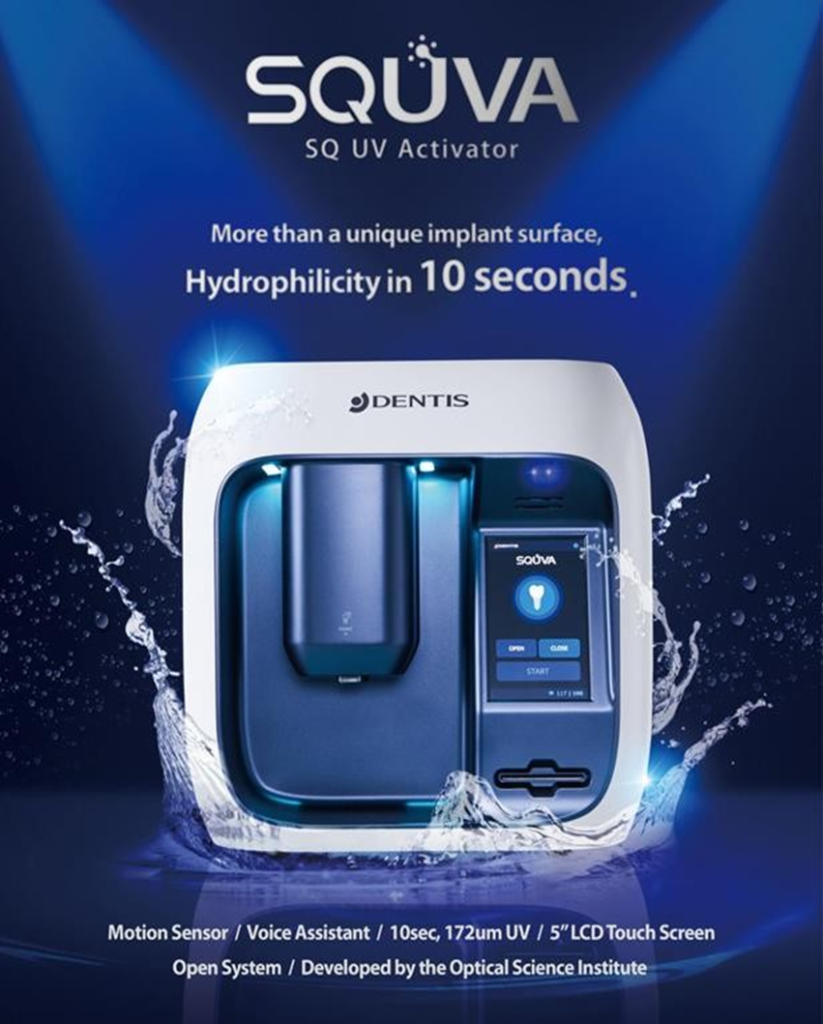
What is SQUVA SQ UV Activator?
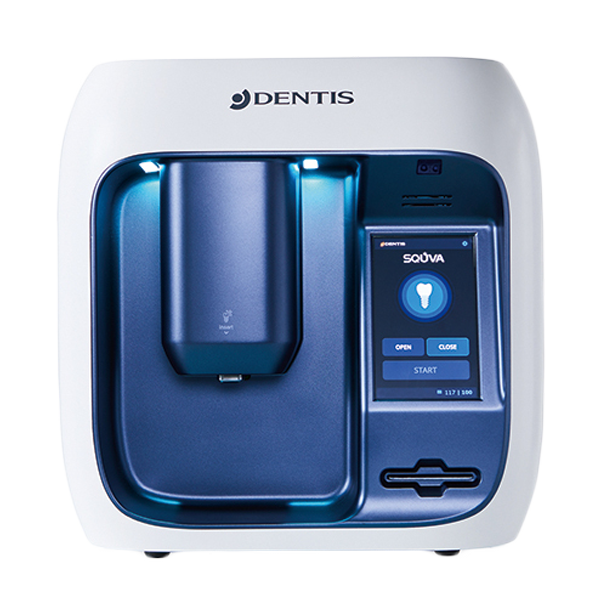
The SQUVA SQ UV Activator is a dental product designed to enhance the hydrophilicity of implant surfaces.
Purpose of Use
- The SQ UV Activator is specifically intended to increase the hydrophilicity (water- attracting properties) of implant surfaces.
- It plays a crucial role in ensuring successful implant procedures.
Conditions for Use:
- Temperature Range: 0°C to 40°C.
- Keep the operating environment within this temperature range for optimal performance.
Components and Specifications
Components
- SQ UV Activator
- Adapter & Power Plug
- FIXTURE Driver KIT
- RFID CARD
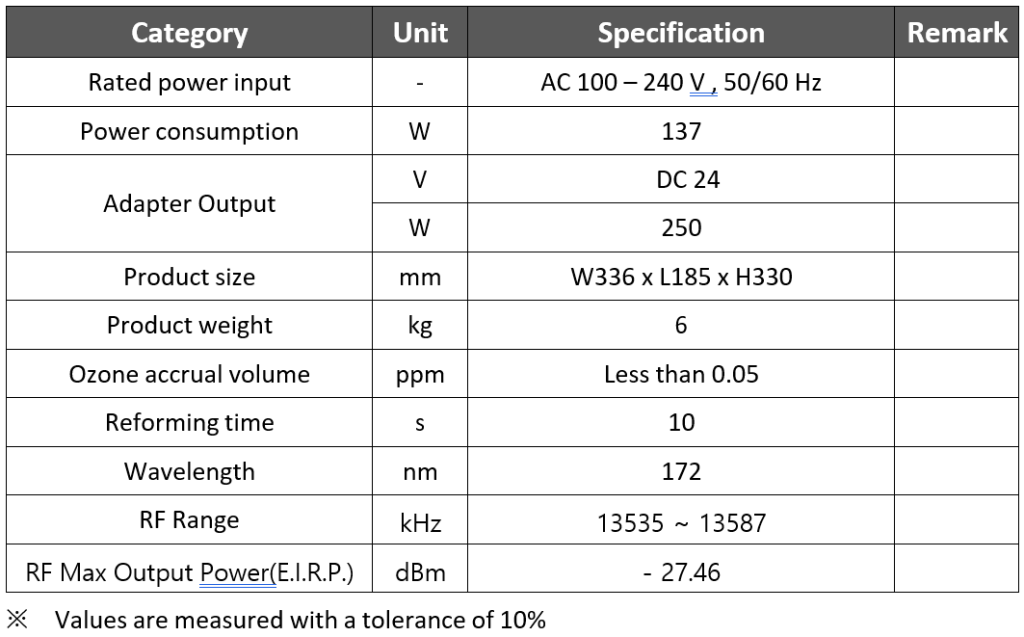
Specifications
- Rated Power Input: AC 100 – 240 V, 50/60 Hz
- Power Consumption: DC 24 (Adapter Output)
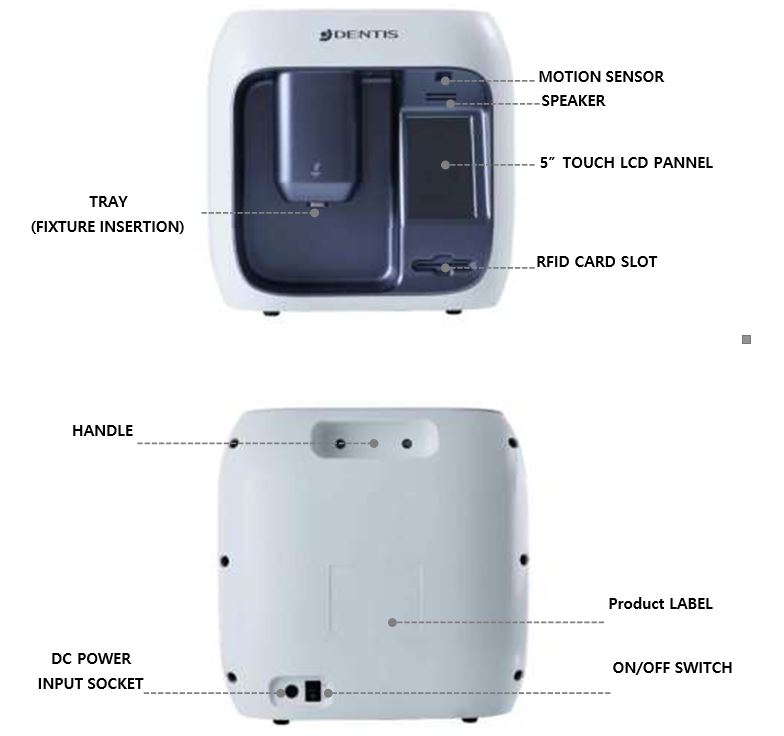
RFID CARD Slot
The SQ UV Activator includes an RFID card slot for identification or tracking purposes
Components and Specifications
Components

Specifications
Use
Components
How to Use
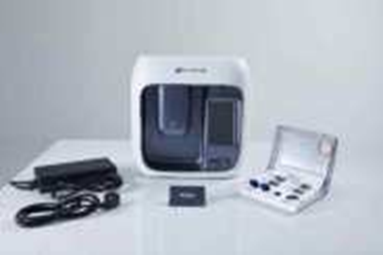
Check the SQUVA components
- SQUVA
- Adapter
- RFID CARD
- Power Cord
- FIXTURE Driver KIT
- USER’S MANUAL
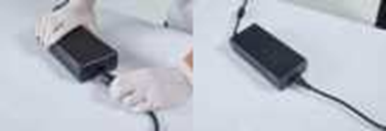

Connect the adapter and power cord. Adapter outpt “4Pin Jack” at the back of the body. (Pay attention to direction).
Plug the power cord into an outlet

Turn on the power button at the back of the main body.
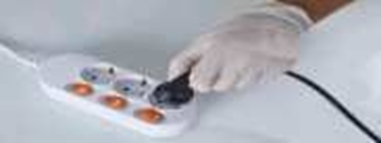
Insert the RFID CARD into the designated slot.
Press the “OPEN” button on the LCD. (Make sure the TRAY is downward.)

Prepare a FIXTURE to be reformed. Close the sterilized FIXTURE support by rotating it clockwise two to three times. (The FIXTURE support must be sterilized before use)
(Do not allow FIXTURE to touch hands or other parts)
(Handle the ampoule to prevent contamination) (Check that the FIXTURE is fully engaged in the FIXTURE driver. Incomplete tightening may cause FIXTURE to fall during process)

Place the FIXTURE support in the center groove of the TRAY. (Ensure that it is correctly seated in the middle circle)

With the TRAY lowered, press the “START” button on the LCD screen to start the refinement.
(Ensure that FIXTURE driver is correctly engaged before pressing the “START” button) (Does not work when tray is raised)

If “Complete” is displayed on the LCD screen, verify that the reforming has been completed. Remove the FIXTURE driver. (When removing the FIXTURE driver, lean and take out the FIXTURE driver) (Burn hazard could result if you hold the upper part of the FIXTURE Driver after work, so please hold the lower part of the driver (large area in the picture). (The TRAY automatically comes down when the reforming is complete, and the TRAY automatically rises when the pump stops. Press the “OPEN” button to take out the FIXTURE driver from the TRAY that is closed)
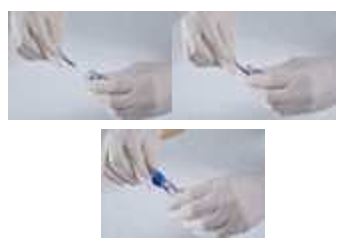
Insert the FIXTURE mounted on the FIXTURE driver into the existing ampule and remove it by turning the FIXTURE support counterclockwise.
(Check that the FIXTURE is completely separated from the FIXTURE driver.
Incomplete separation may cause FIXTURE to fall during movement) Fit angle driver to reformed FIXTURE and install it on the patient
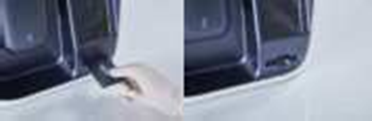
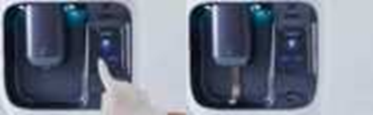
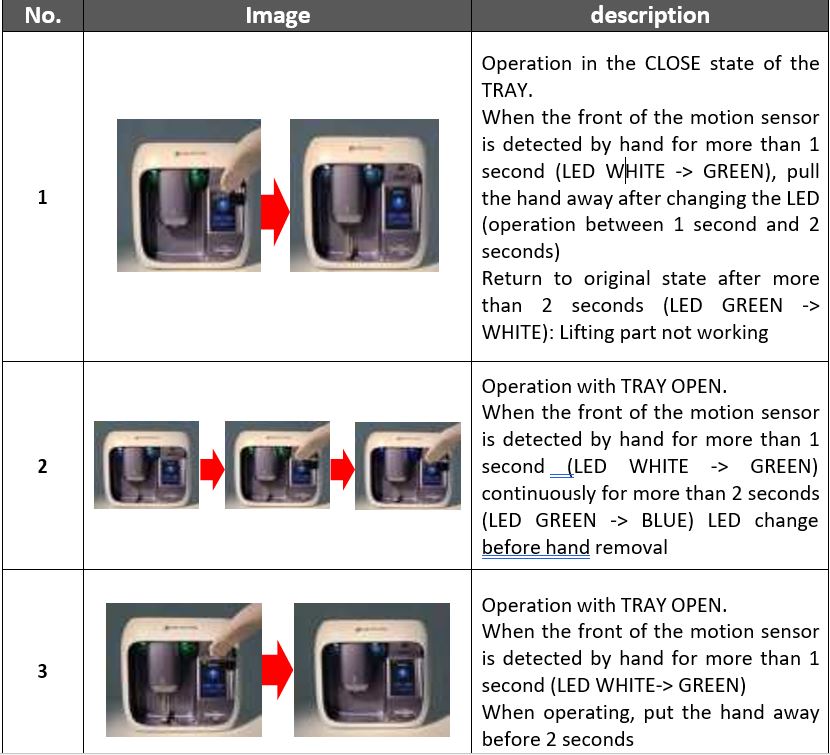
Control part


Sensor Explanation
Storage Method
- Close and store the TRAY after use.
- Don’t twist the power cord and store it.
- Please keep it away from the water.
- In case of an earthquake, do not store on a high shelf.
- After use, turn the power button off.
- If not used for a long time, keep the adapter and main body separately.
Cleaning and Sterilization
Cleaning and Sterilizing Fixture Driver
- The used kits and instruments should be cleaned with distilled or flowing water with a temperature of 30~40℃, using a brush for 20 seconds to wash away any remaining blood and external materials.
- Tools which have inner parts needs to be cleaned up, such as a torque wrench, should be dismantled to wash away any remaining blood and foreign materials.
- Make 1% TergazymeTM mixture mixed 1L 30~40℃ water and TergazymeTM 10mL in the
- cleaning water tank and keep the kits and instruments in the 1% TergazymeTM mixture for 10 minutes. (using ultrasonic cleaning machine is more effective)
- The kits and instruments should be washed using distilled or flowing water (30 ~ 40℃)
- using a brush for cleaning 3 times.
- Use air blower, wipers or fabrics in order named to remove water on the kits and instruments. Finally, use alcohol cotton to remove water stain on the kits and instruments.
Cleaning and Disinfection the Main Body
- Before and after using the product, sterilize the contents of FIXTURE KIT (FIXTURE support, etc.) and FIXTURE CASE.
- The following substances cannot be used :
– High concentration organic and inorganic acids, chlorinated hydrocarbons
Sterilization
- Before and after using the product, sterilize the FIXTURE driver and FIXTURE case.
- Autoclave by adding FIXTURE case and FIXTURE driverAutoclave by adding FIXTURE case and FIXTURE driver
- Sterilization condition (Please refer to the sterilization methods for each country)

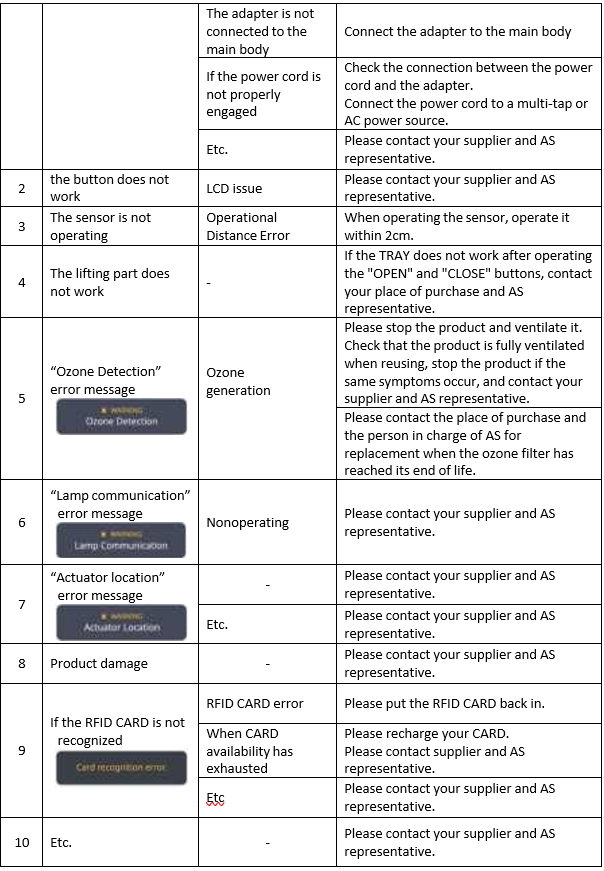
Troubleshooting